

This tutorial is my own design and any resemblance to any other tutorial is purely coincidental. It was created in Paint Shop Pro X. © 2015 - Yvonne - Yorkshire Lass Designs - All rights reserved. You will need the following to complete this tutorial: site_divers_1219072744_divers.pspimage (from Reveries) LF-Mask-209.jpg (from Linda PSP Design) Gabry-woman 604. pspimage (from Tube e Mist Gabry) yp-text-city.psp yp-text-drama-in-time.psp metropolis.jpg All the above can be downloaded here Download and extract to a file on your computer. Open in PSP and minimise Plugins Xero - Porcelain Available here http://www.fleursauvage.be/utilitaire/filtres/filtres.htm Download and extract to your Plugins folder *********** Drag this arrow with you to mark your place in the tutorial 
********** INSTRUCTIONS STEP 1 Open a new canvas 800 x 600 transparent background 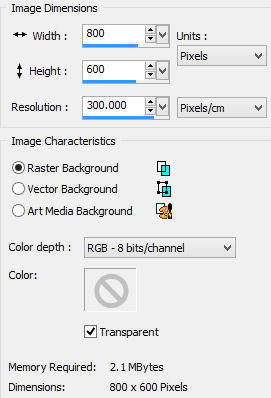
STEP 2 In the Materials Palette load Foreground with #00B2BA Blue and Background with #000000 Black Select Flood Fill Tool and fill layer with Background Colour #000000 Black STEP 3 Layers >> New Raster Layer Flood fill layer with Foreground Colour #00B2BA Blue STEP 4 Layers >> New Mask Layer >> From Image Select LF-Mask-209.jpg from the dropdown options 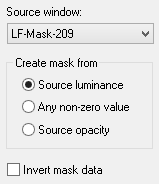
Layers >> Merge Group Adjust >> Sharpen >> Sharpen More STEP 5 Layers >> New Raster Layer Selection Tool >> Selection >> Custom Selection 
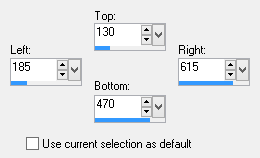
STEP 6 Maximise metropolis.jpg Edit >> Copy Minimise original Edit >> Paste into Selection Selections >> Select None Adjust >> Sharpness >> Sharpen More STEP 7 Layers >> New Raster Layer Selection Tool >> Selection >> Custom Selection 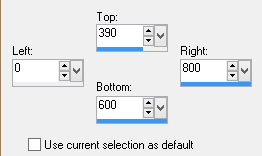
STEP 8 Maximise site_divers_1219072744_divers.pspimage Edit >> Copy Minimise original Edit >> Paste into Selection Selections >> Select None Adjust >> Sharpness >> Sharpen More STEP 9 Layers >> New Raster Layer Selection Tool >> Selection >> Custom Selection 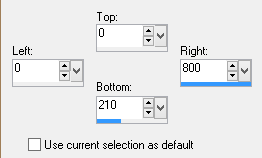
STEP 10 Repeat STEP 8 STEP 11 Layers >> Merge >> Merge Down Edit >> Repeat Layer Merge Down This is what the Layer Palette looks like now 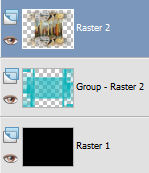
STEP 12 Make sure Raster 2 (the top layer) is highlighted in the Layer Palette Selection Tool >> Selection >> Custom Selection 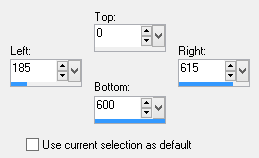
Selections >> Modify >> Contract Number of pixels = 2 Selections >> Invert Edit >> Clear Selections >> Select None STEP 13 Effects >> Plugins >> Xero >> Porcelain 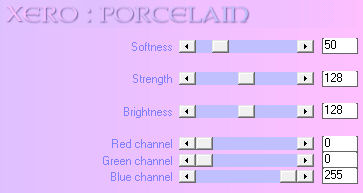
This is what you should have now 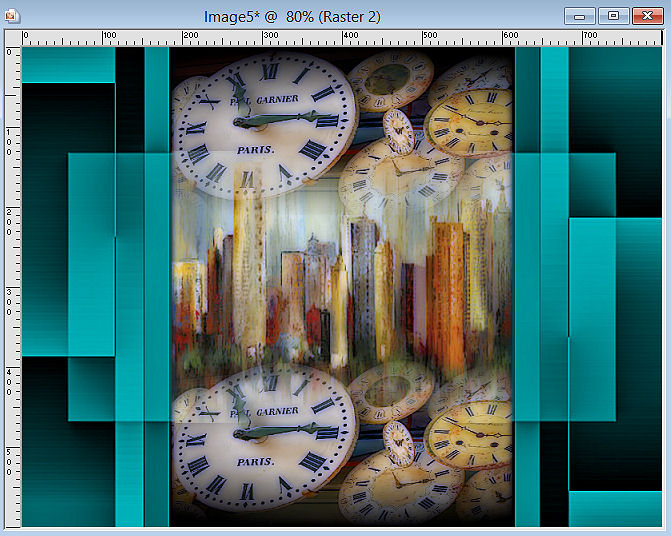
STEP 14 Maximise Gabry-woman 604.pspimage Edit >> Copy Minimise original Edit >> Paste as New Layer Image >> Mirror Effects >> Image Effects >> Offset 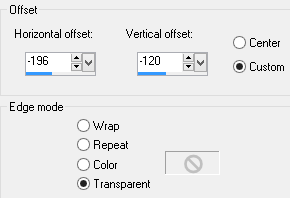
STEP 15 Effects >> 3D Effects >> Drop Shadow 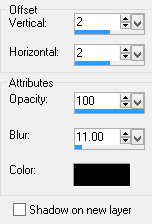
STEP 16 Layers >> New Raster Layer Selection Tool >> Selection >> Custom Selection 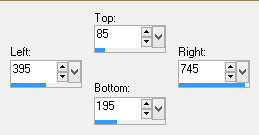
STEP 17 Maximise yp-text-city.psp Edit >> Copy Minimise original Selections >> Select None Effects >> 3D Effects >> Drop Shadow Same settings as in STEP 15 STEP 18 Layers >> New Raster Layer Selection Tool >> Selection >> Custom Selection 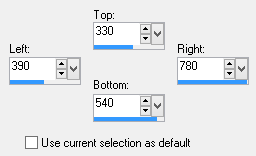
STEP 19 Maximise yp-text-drama-in-time.psp Edit >> Copy Minimise original Edit >> Paste into Selection Selections >> Select None Effects >> 3D Effects >> Drop Shadow Same settings as in STEP 15 STEP 20 Layers >> New Raster Layer Add your name and/or watermark Layers >> Merge >> Merge All (Flatten) STEP 21 Image >> Add Borders 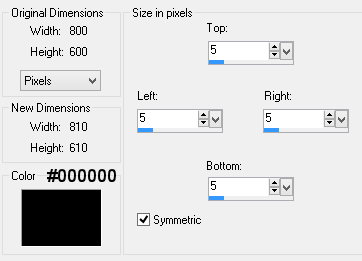
< STEP 21 Resize if desired Save as a jpg I hope you enjoyed this tutorial. Other results for this tutorial can be found here If you have any questions or would like to show me your result EMAIL ME Return to Tutorials - Page 3 |