
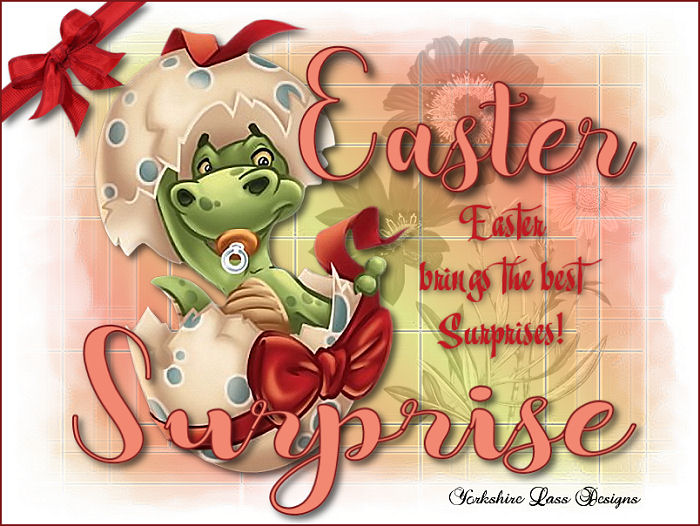
This tutorial is my own design and any resemblance to any other tutorial is purely coincidental. It was created in Paint Shop Pro X © April 2020 - Yvonne - Yorkshire Lass Designs - All rights reserved. You will need the following to complete this tutorial: Masks Mask 058 images_1217491084_masques Tubes MR_Easter Dragon.png (from Tubes and Creations Maryse Flowers09_de'de'.psp LF-Ribbon2-22012014.png yp-text-easter.pspimage yp-text-easter-brings-surprises.pspimage yp-text-surprises.pspimage The above can be downloaded here Download and extract supplies to a file on your computer then open in PSP and minimise ********** Drag this arrow with you to mark your place in the tutorial 
********** STEP 1 Open a new canvas 800 x 600 pixels white 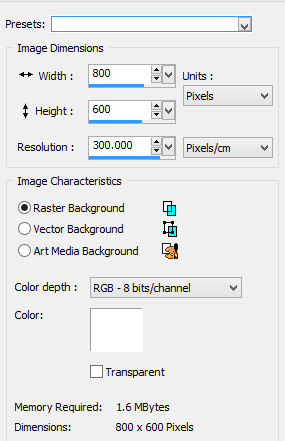
Layers >> Promote Background Layer STEP 2 In the Materials Palette load Foreground with #E0E48F Green and Background with #F28872 Dark Pink 
Make a foreground-background gradient Style=Linear 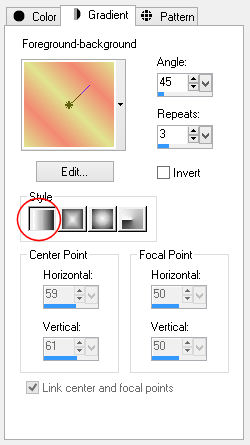
STEP 3 Layers >> New Raster Layer Flood fill this layer with the gradient. STEP 4 Layers >> New Mask Layer >> From Image Select images_1217491084_masques from the dropdown list 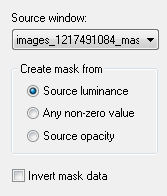
Layers >> Merge >> Merge Group STEP 5 Layers >> New Mask Layer >> From Image Select Mask 058 from the dropdown list 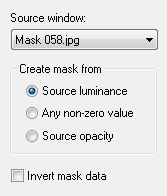
Layers >> Merge >> Merge Group Effects >> Edge Effects >> Enhance STEP 6 Maximise tube Flowers09_de'de'.psp Edit >> Copy Minimise original Edit >> Paste as New Layer Effects >> Image Effects >> Offset 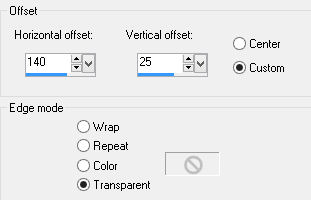
In the Layers Palette, reduce Opacity to 38% and Blend Mode to Luminance Legacy 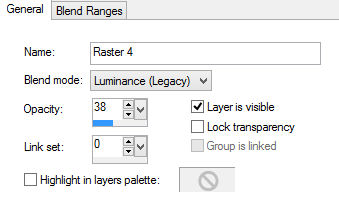
STEP 7 Maximise tube MR_Easter Dragon.png Window duplicate Remove tuber's name from tube Edit >> Copy Minimise tube Edit >> Paste as New Layer Image >> Resize 90% Resize all layers UNCHECKED Effects >> Image Effects >> Offset 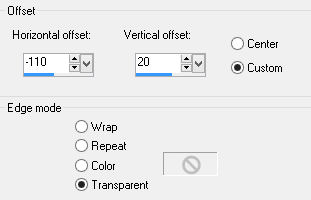
Adjust >> Sharpness >> Sharpen Effects >> 3D Effects >> Drop Shadow 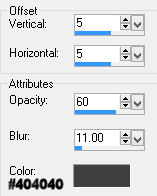
STEP 8 Layers >> New Raster Layer Maximise yp-text-easter-brings-surprises.pspimage Edit >> Copy Minimise original Selection Tool Click on Custom selection 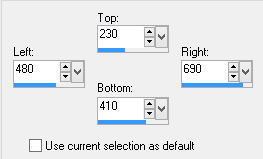
Edit >> Paste into Selection Selections >> Select None Effects >> 3D Effects >> Drop Shadow 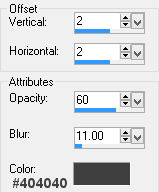
STEP 9 Layers >> New Raster Layer Maximise yp-text-easter.pspimage Edit >> Copy Minimise original Selection Tool Click on Custom selection 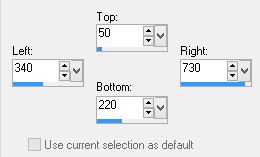
Edit >> Paste into Selection Selections >> Select None Effects >> 3D Effects >> Drop Shadow 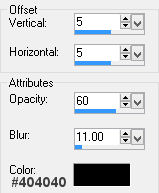
STEP 10 Layers >> New Raster Layer Maximise yp-text-surprise.pspimage Edit >> Copy Minimise original Selection Tool Click on Custom selection 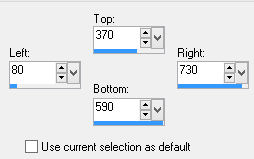
Edit >> Paste into Selection Selections >> Select None Effects >> 3D Effects >> Drop Shadow 
STEP 11 Maximise tube LF-Ribbon-22012014.png Window >> Duplicate Remove tuber's name from tube Edit >> Copy Minimise tube Edit >> Paste as New Layer Image >> Resize 50% Resize all layers UNCHECKED Image >> Free Rotate Left 40 degrees 
Effects >> Image Effects >> Offset 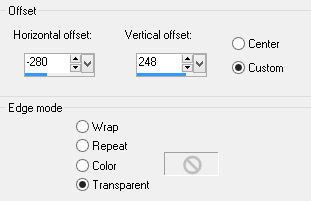
Adjust >> Sharpness >> Sharpen Effects >> 3D Effects >> Drop Shadow 
STEP 12 Layers >> New Raster Layer Add your name and/or watermark STEP 13 Image >> Add Borders 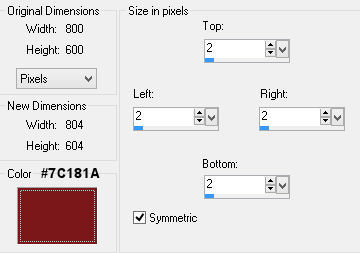
STEP 14 Resize if desired Save as a jpg and we're done. I hope you enjoyed this tutorial! If you have any questions or would just like to show me your result EMAIL ME BACK TO TUTORIALS - PAGE 4 |