

This tutorial is my own design and any resemblance to any other tutorial is purely coincidental. It was created in Paint Shop Pro X. © 2016 - Yvonne - Yorkshire Lass Designs - All rights reserved. You will need the following to complete this tutorial: cas_Mask_0415_30.jpg (from Casiop's Univers) creation.tine_masque114.jpg(from Tine) yp-text-love-is-the-honey.pspimage yp-text-life-is-the-flower.pspimage yp-honey-bee.pspimage yp-honey-bee2.pspimage yp_perfume_marc_jacobs_honey01.psp YLD-honey-bee.PspSelection YLD-honey-bee2.PspSelection YLD-honey-perfume.PspSelection YLD-life-is-the-flower.PspSelection YLD-love-is-the-honey.PspSelection The above can be downloaded here Download and extract to a file on your computer. Open masks and tubes in PSP and minimise. Place selections in your PSP Files/Selections folder. Plugins Penta.com - Color Dot Available here http://www.fleursauvage.be/utilitaire/filtres/filtres.htm Download and extract to your Plugins folder *********** Drag this arrow with you to mark your place in the tutorial 
********** INSTRUCTIONS STEP 1 Open a new canvas 800 x 600 transparent background 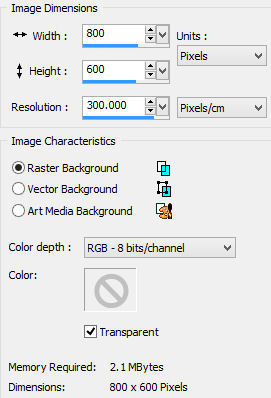
STEP 2 In the Materials Palette load Foreground with #FBEEB2 Fawn and Background with #000000 Black Change Foreground Style to Gradient with the following settings 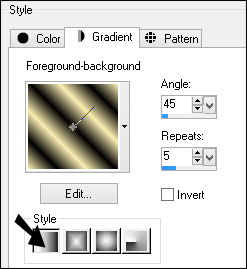
Select Floodfill Tool and fill layer with gradient Adjust >> Blur >> Gaussian Blur Radius = 60 Effects >> PlugIns >> penta.com >> color dot 
STEP 3 Layers >> New Raster Layer Select Floodfill Tool and fill layer with Background Colour #000000 Black STEP 4 In the Materials Palette change Foreground Style to Color Load Foreground with #FDDF1F Yellow Layers >> New Raster Layer Fill layer with Foreground Colour #FDDF1F Yellow STEP 5 Layers >> New Mask Layer Select creation.tine_masque114.jpg from the dropdown list 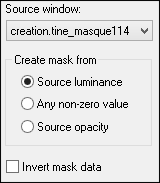
Layers >> Merge Group STEP 6 In the Materials Palette Load Foreground with #FFFFFF White Layers >> New Raster Layer Select Floodfill Tool and fill layer with Foreground Colour #FFFFFF White Layers >> New Mask Layer Select cas_Mask_0415_30.jpg from the dropdown list 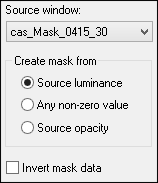
Layers >> Merge Group STEP 7 In the Layers Palette, make the bottom layer (Raster 1) invisible Make sure the top layer (Group - Raster 3) is highlighted 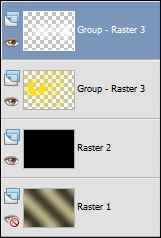
Layers >> Merge visible In the Layers Palette change Blend Mode of the Merged Layer to Hard light Layers >> Properties 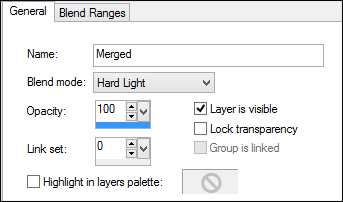
Make the bottom layer (Raster 1) visible STEP 8 Layer >> New Raster Layer Selections >> Select All Selections >> Modify >> Contract Number of pixels: 2 Selections >> Invert Floodfill selection with Foreground colour #FFFFFF White Selections >> Select None Layers >> Merge >> Merge Down Image >> Resize 80% Resize All Layers UNCHECKED Adjust >> Sharpness >> Sharpen More This is what you should have now 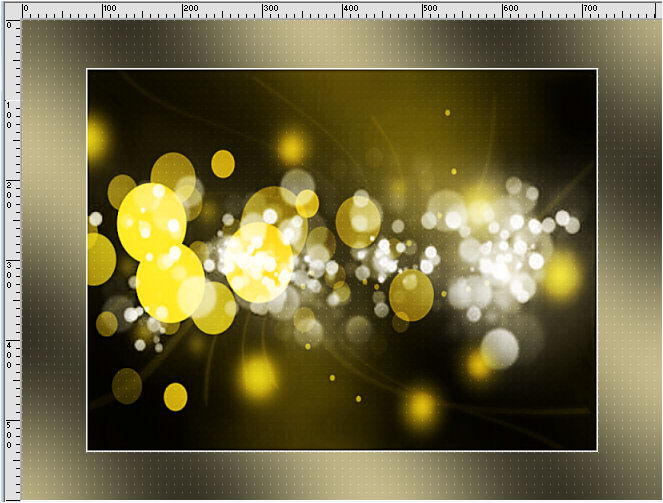
STEP 9 Layers >> New Raster Layer Selections >> Load/Save Selections >> Load Selection from Disk Select YLD-honey-perfume.PspSelection from the dropdown list 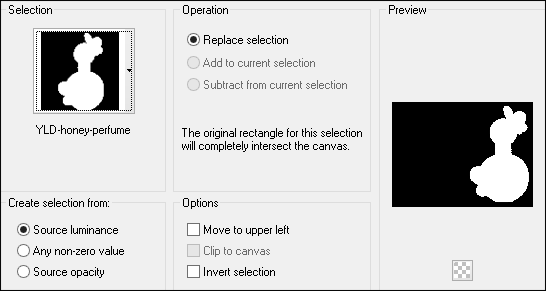
STEP 10 Maximise tube yp_perfume_marc_jacobs_honey01.psp Edit >> Copy Minimise tube Edit >> Paste >> Paste into Selection Selections >> None STEP 11 Effects >> 3D Effects >> Drop Shadow 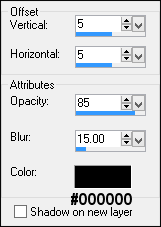
STEP 12 Layers >> New Raster Layer Selections >> Load/Save Selections >> Load Selection from Disk Select YLD-honey-bee.PspSelection from the dropdown list 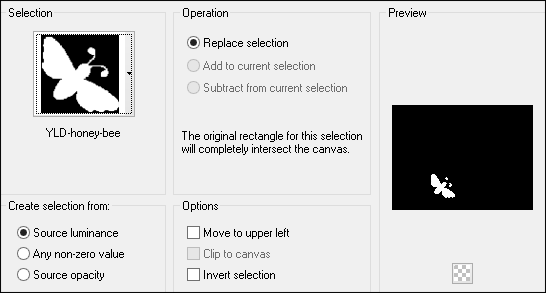
STEP 13 Maximise tube yp-honey-bee.pspimage Edit >> Copy Minimise tube Edit >> Paste >> Paste into Selection Selections >> None In the Layer Palette reduce opacity to 53 Layers >> Properties 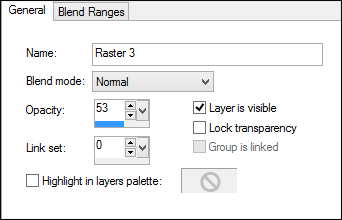
STEP 14 Layers >> New Raster Layer Selections >> Load/Save Selections >> Load Selection from Disk Select YLD-honey-bee2.PspSelection from the dropdown list 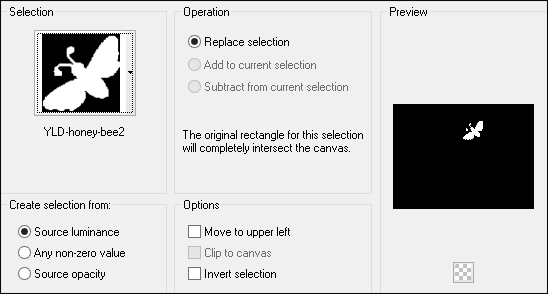
STEP 15 Maximise tube yp-honey-bee2.pspimage Edit >> Copy Minimise tube Edit >> Paste >> Paste into Selection Selections >> None In the Layer Palette reduce opacity to 53 Layers >> Properties 
STEP 16 Layers >> New Raster Layer Selections >> Load/Save Selections >> Load Selection from Disk Select YLD-life-is-the-flower.PspSelection from the dropdown list 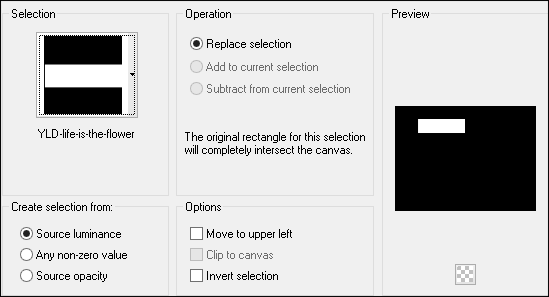
STEP 17 Maximise tube yp-text-life-is-the-flower.pspimage Edit >> Copy Minimise tube Edit >> Paste >> Paste into Selection Selections >> None In the Layer Palette reduce opacity to 53 Layers >> Properties 
STEP 18 Layers >> New Raster Layer Selections >> Load/Save Selections >> Load Selection from Disk Select YLD-love-is-the-honey.PspSelection from the dropdown list 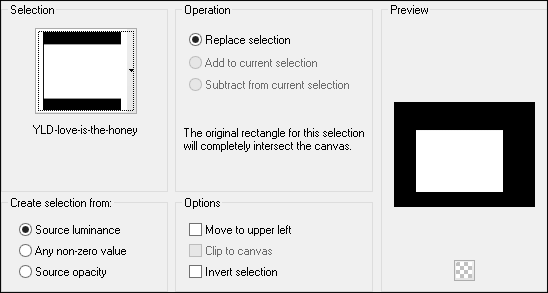
STEP 19 Maximise tube yp-text-love-is-the-honey.pspimage Edit >> Copy Minimise tube Edit >> Paste >> Paste into Selection Selections >> None STEP 20 Effects >> 3D Effects >> Drop Shadow 
STEP 21 Layers >> New Raster Layer Add your name and/or watermark STEP 22 Layers >> Merge All (Flatten) STEP 23 Image >> Add Borders 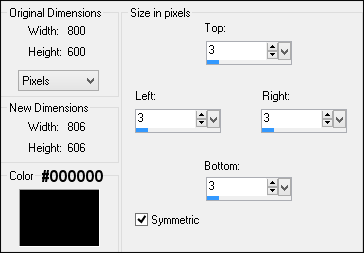
STEP 24 Resize if desired Save as a jpg. I hope you enjoyed this tutorial. If you have any questions or would like to show me your result EMAIL ME Return to Tutorials - Page 3 |