
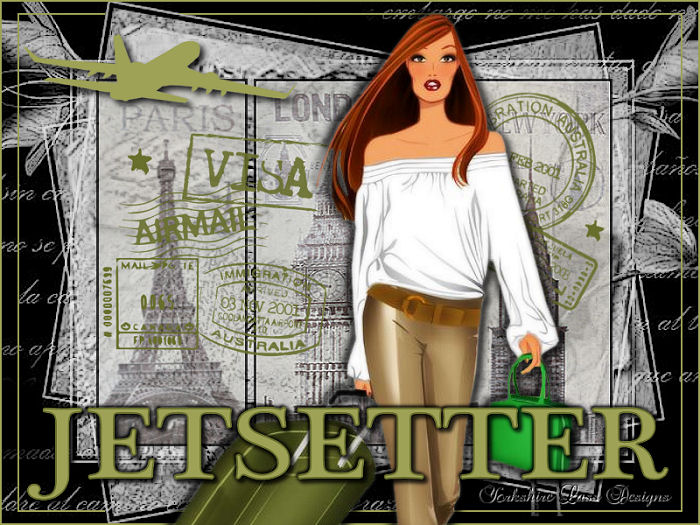
This tutorial is my own design and any resemblance to any other tutorial is purely coincidental. It was created in Paint Shop Pro X. © April 2018 - Yvonne - Yorkshire Lass Designs - All rights reserved. You will need the following to complete this tutorial: eiffel-tower-paris.jpg chrysler-building-new-york.jpg big-ben-london.jpg frameMB29.jpg aaabibichevec100.pspimage YLD-aeroplane.pspbrush (Brush made with free vector image from Pixabay YLD-visa-stamp1.pspbrush YLD-visa-stamp2.pspbrush (Brushes made with vector images from Designed by vvstudio / Freepik yp-text-jetsetter.pspimage The above can be downloaded here Download and extract to a file on your computer Place brushes in your PSP Files/Brushes folder or wherever you keep your custom brushes Open all other supplies in PSP and minimise *********** Drag this arrow with you to mark your place in the tutorial Drag and Drop Script from Dynamic Drive 
********** INSTRUCTIONS STEP 1 Open a new canvas 800 x 600 transparent background 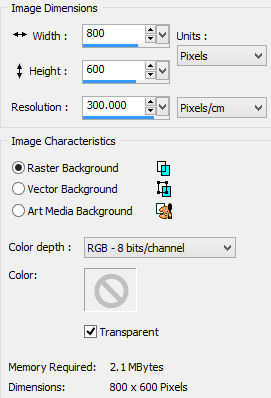
STEP 2 In the Materials Palette load Foreground with #000000 BLACK and Background with #FFFFFF WHITE Fill layer with Foreground colour #000000 BLACK STEP 3 Layers >> New Raster Layer Fill layer with Background colour #000000 WHITE Layers >> New Mask Layer >> From Image Select frameMB29.jpg from the dropdown list 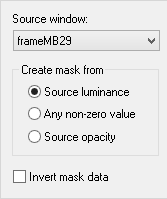
Layers >> Merge >> Merge Group Image >> Resize 120% Resize all layers UNCHECKED Effects >> Image Effects >> Offset 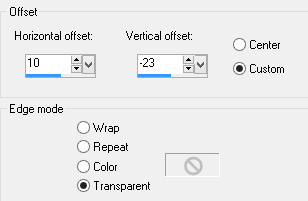
Effects >> Edge Effects >> Enhance More STEP 4 Layers >> New Raster Layer Selection Tool >> Custom Selection 

Fill selection with Foreground colour #000000 BLACK Selections >> Modify >> Contract Number of pixels = 3 DO NOT deselect Maximise eiffel-tower-paris.jpg Edit >> Copy Minimise original Edit >> Paste into Selection Selections >> Select None In the Layers Palette reduce opacity of Raster 2 to 75% 
Effects >> Edge Effects >> Enhance STEP 5 Layers >> New Raster Layer Selection Tool >> Custom Selection 
Fill selection with Foreground colour #000000 BLACK Selections >> Modify >> Contract Number of pixels = 3 DO NOT deselect Maximise big-ben-london.jpg Edit >> Copy Minimise original Edit >> Paste into Selection Selections >> Select None In the Layers Palette reduce opacity of Raster 3 to 75% 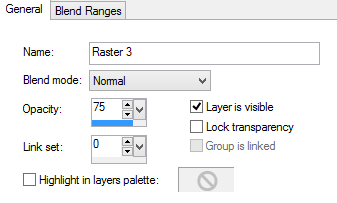
Effects >> Edge Effects >> Enhance STEP 6 Layers >> New Raster Layer Selection Tool >> Custom Selection 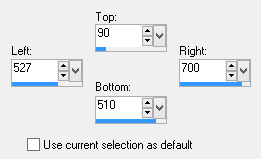
Fill selection with Foreground colour #000000 BLACK Selections >> Modify >> Contract Number of pixels = 3 DO NOT deselect Maximise chrysler-building-new-york.jpg Edit >> Copy Minimise original Edit >> Paste into Selection Selections >> Select None In the Layers Palette reduce opacity of Raster 4 to 75% 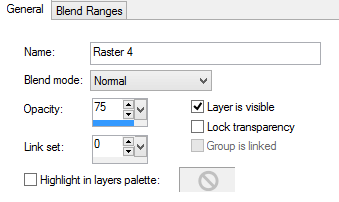
Effects >> Edge Effects >> Enhance STEP 7 In the Materials Palette load Foreground with #9EA257 GREEN Layers >> New Raster Layer Selections >> Select All Selections >> Modify >> Contract Number of pixels = 2 Selections >> Invert Fill selection with Foreground colour #9EA257 GREEN Selections >> Select None Image >> Resize 95% Resize all layers UNCHECKED STEP 8 Select Freehand Selection Tool Select part of green line as below 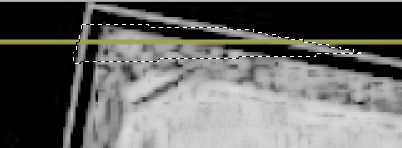
Edit >> Clear Selections >> Select None Repeat the above for the bottom edge 
Edit >> Clear Selections >> Select None STEP 9 Layers >> New Raster Layer Selections >> Select All Selections >> Modify >> Contract Number of pixels = 2 Selections >> Invert Fill selection with Foreground colour #9EA257 GREEN Selections >> Select None STEP 10 Select Paint Brush Tool Select YLD-aeroplane.pspbrush from the options with the following settings Drag brush to co-ordinates x:182, y:78 (refer to status bar at the bottom right-hand corner of the screen) Click left mouse button once Effects >> 3D Effects >> Drop Shadow 
STEP 11 In the Materials Palette load Foreground with #686F2D DARK GREEN Layers >> New Raster Layer Select the Paint Brush tool Select YLD-visa-stamp1.pspbrush from the options with the following settings Drag brush to co-ordinates x:616, y:211 (refer to status bar at the bottom right-hand corner of the screen) Click left mouse button once Select Freehand Selection Tool Zoom in and select "AIR MAIL PAR AVION" 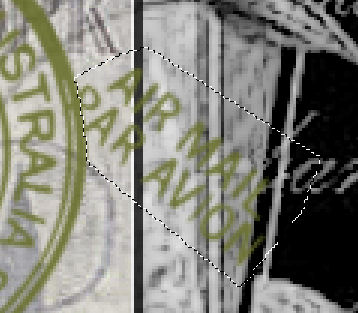
Edit >> Clear Selections >> Select None STEP 12 Layers >> New Raster Layer Select Paint Brush Tool Select YLD-visa-stamp2.pspbrush from the options with the following settings Drag brush to co-ordinates x:252, y:268 (refer to status bar at the bottom right-hand corner of the screen) Click left mouse button once STEP 13 Maximise aaabibichevec100.pspimage Edit >> Copy Minimise original Edit >> Paste as New Layer Effects >> Image Effects >> Offset 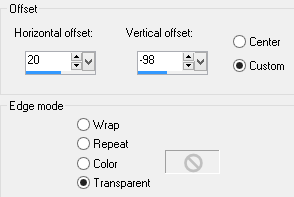
Using the Freehand Selection Tool, feather = 1 Zoom in, hold down the SHIFT key and select the excess background as below 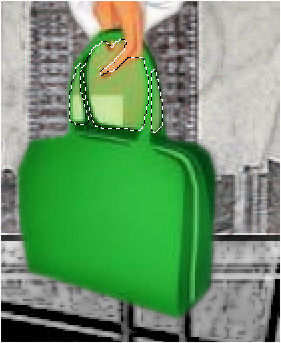
Edit >> Clear Selections >> Select None Effects >> 3D Effects >> Drop Shadow 
Repeat Drop Shadow changing the Horizontal and Vertical Offsets to minus 5 (-5) STEP 14 Maximise yp-text-jetsetter.pspimage Edit >> Copy Minimise original Edit >> Paste as New Layer Effects >> Image Effects >> Offset 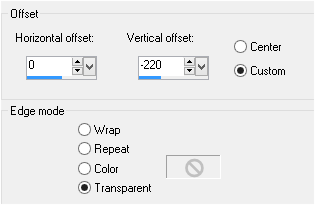
Effects >> 3D Effects >> Drop Shadow 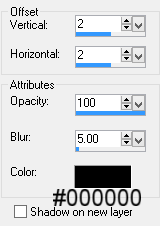
Repeat Drop Shadow changing the Horizontal and Vertical Offsets to minus 2 (-2) STEP 15 Layers >> New Raster Layer Add your name and/or watermark STEP 16 Layers >> Merge All (Flatten) Resize if desired Save as a jpg I hope you enjoyed this tutorial. If you have any questions or would like to show me your result EMAIL ME Return to PSP Tutorials - Page 4 |