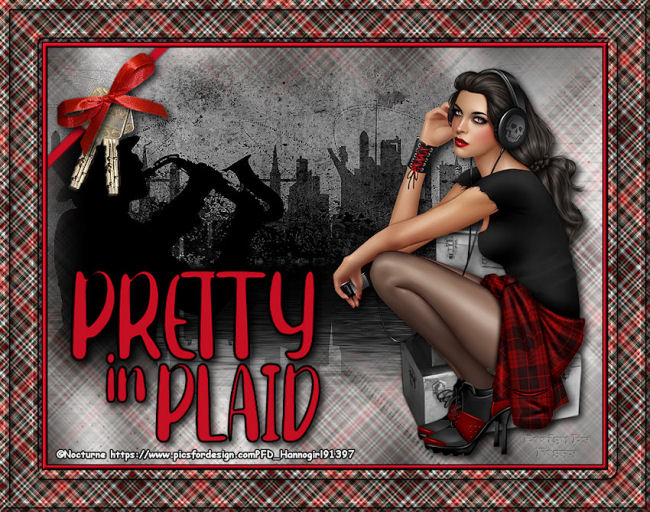

This tutorial is my own design and any resemblance to any other tutorial is purely coincidental. It was created in Paint Shop Pro X © April 2020 - Yvonne - Yorkshire Lass Designs - All rights reserved You will need the following to complete this tutorial: Tubes cle310907.psp (keys) diversensk 2011 165.pspimage (car) Heidis Designs image7Pretty-in-plaid_LR-06-18-0_pspimage (lady) PatryTubes_Ribbons6.pspimage (bow) yp-metal-trunks.pspimage yp-pattern-plaid.jpg yp-ribbon-strip yp-text-pretty-in-plaid-2.pspimage Mask MASK-MD-011 The above can be downloaded here Download and extract to a file on your computer Open in PSP and minimise Plugins Graphics Plus - Cross Shadow Available here Download and extract to your Plugins folder *********** Drag this arrow with you to mark your place in the tutorial 
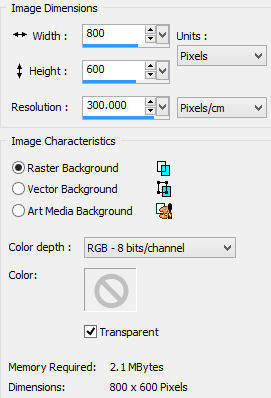
********** INSTRUCTIONS STEP 1 Open a new canvas 800 x 600 transparent background 
STEP 2 In the Materials Palette load Foreground with #FFFFFF WHITE Flood fill layer with Foreground Colour STEP 3 Effects >> Pugins >> Graphics Plus >> Cross Shadow 
STEP 4 Layer >> New Raster Layer In the Materials Palette, change Style to PATTERN Select yp-pattern-plaid from the drop down list Angle = 45 Scale = 42 
Flood fill layer with pattern STEP 5 Layers >> New Mask Layer >> From Image Select MASK-MD-011 from the drop down list 
Layers >> Merge >> Merge Group STEP 6 Maximise diversehsk 2011 165.pspimage (car) Edit >> Copy Minimise original Edit >> Paste as New Layer Image >> Mirror Image >> Resize 60% Resize All Layers UNCHECKED Effects >> Image Effects >> Offset 
Adjust >> Hue and Saturation >> Colorize 
Adjust >> Sharpness >> Sharpen STEP 7 Layers >> New Raster Layer Selection Tool >> Custom Selection 
STEP 8 Maximise yp-metal-trunks.psp Window >> Duplicate Image >> Mirror Edit >> Copy Minimise duplicate copy Edit >> Paste into Selection Select >> None Adjust >> Hue and Saturation >> Colorize Hue = 0 Saturation = 0 Adjust >> Sharpness >> Sharpen Effects >> 3D Effects >> Drop Shadow 
STEP 9 Layers >> New Raster Layer Selection Tool >> Custom Selection 
Maximise yp-text-pretty-in-laid.pspimage Edit >> Copy Minimise original Edit >> Paste into Selection Select >> None Effects >> 3D Effects >> Drop Shadow 
STEP 10 Layers >> New Raster Layer Selection Tool >> Custom Selection 
Maximise image7Pretty in Plaid_LR-06-18-0_.pspimage (lady) Edit >> Copy Minimise orginal Edit >> Paste into Selection Selections >> Select None Adjust >> Sharpness >> Sharpen Effects >> 3D Effects >> Drop Shadow 
STEP 11 Maximise yp-ribbon-strip.pspimage Edit >> Copy Minimise original Edit >> Paste >> Paste as New Layer Effects >> Image Effects >> Offset 
STEP 12 Maximise cle310907.psp (keys) In the Layer Palette highlight Raster 7 Edit >> Copy Minimise orginal Edit >> Paste as New Layer Image >> Free Rotate 
STEP 13 Zoom in and select the mark to the left of the key 
Edit >> Clear STEP 14 Layers >> Duplicate Image >> Free Rotate 
STEP 15 Move the top key over the bottom key so that the holes align Layers >> Merge >> Merge Down Effects >> Image Effects >> Offset 
Adjust >> Sharpness >> Sharpen Effects >> 3D Effects >> Drop Shadow 
STEP 16 Maximise PatryTubes_Ribbons6.pspimage (bow) In the Layers Palette highlight Layer 2 Edit >> Copy Minimise original Edit >> Paste as New Layer Select and delete the green and blue bows Image >> Free Rotate 
With the Move Tool, position bow over holes of keys Adjust >> Sharpness >> Sharpen Effects >> 3D Effects >> Drop Shadow 
STEP 17 Layers >> New Raster Layer Add your name and/or watermark STEP 18 Image >> Add Borders 
STEP 19 Image >> Add Borders 
STEP 20 Select the red border with the Magic Wand using the following settings 
Effects >> 3D Effects >> Inner Bevel 
Selections >> Select None STEP 21 Image >> Add Borders 
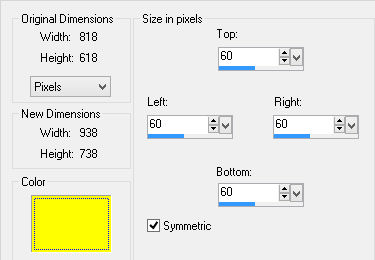
STEP 22 Image >> Add Borders Use any bright contrasting colour (I chose a yellow) 
STEP 23 With the Magic Wand (same settings as STEP 20) select the yellow border In the Materials Palette yp-pattern-plaid should still be loaded Flood fill selection with pattern STEP 24 Effects >> 3D Effects >> Inner Bevel 
Selections >> Select None STEP 25 Repeat STEPS 18 to 21 STEP 26 Resize if desired Save as a jpg I hope you enjoyed this tutorial. If you have any questions or would like to show me your result EMAIL ME VERSIONS FROM MY TRANSLATORS Thank you Peggy, Hannogirls-Tutorials-Kiste (Germany) 
BACK TO TUTORIALS - PAGE 4 |