

This tutorial is my own design and any resemblance to any other tutorial is purely coincidental. It was created in Paint Shop Pro X and Animation Shop 3.11 © 2018 - Yvonne - Yorkshire Lass Designs - All rights reserved. You will need the following to complete this tutorial: Tubes skyline at night.pspimage yp_perfume_nuit_etoilee.psp yp_star_perfume_compact.psp LF-Deco7.png(from Linda's PSP Design cas_Mask_0115_05(from Casiops Universe) csq_gold.jpg yp-text-starry-night.pspimage The above can be downloaded here Download and extract to a file on your computer then open in PSP and minimise Plugins DSB Flux - Noise Available here http://www.lesdouceursdecloclo.com/mesfiltres/mes_filtres.htm Download and extract to your Plugins folder *********** Drag this arrow with you to mark your place in the tutorial 
********** INSTRUCTIONS STEP 1 Open a new canvas 800 x 600 transparent background 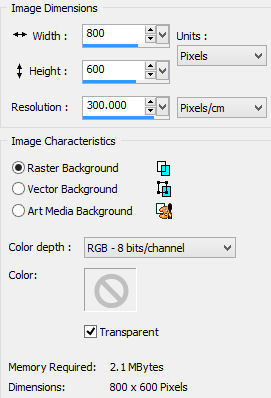
STEP 2 In the Materials Palette load Foreground with #0D2A58 Dark Blue and Background with #FFFFFF White Select Flood Fill tool and fill layer with Foreground colour #0D2A58 Dark Blue STEP 3 Layers >> New Raster Layer Fill layer with Background colour #FFFFFF White STEP 4 Layers >> New Mask Layer >> From Image Select cas_Mask_0115_05 from the drop down list 
Layers >> Merge >> Merge Group In the Layers Palette reduce opacity of GROUP - RASTER 2 to 40% Layers >> Properties 
Effects >> Edge Effects >> Enhance STEP 5 Layers >> New Raster Layer Selections >> Select All Maximise tube skyline at night.pspimage Edit >> Copy Minimise tube Edit >> Paste >> Paste into Selection Selections >> Select None Image >> Resize 125% Resize All Layers UNCHECKED Effects >> Image Effects >> Offset 
Effects >> Edge Effects >> Erode Effects >> Edge Effects >> Enhance Edit >> Repeat Enhance Edges In the Layers Palette reduce opacity of RASTER 2 to 80% Layers >> Properties 
This is what you should have now 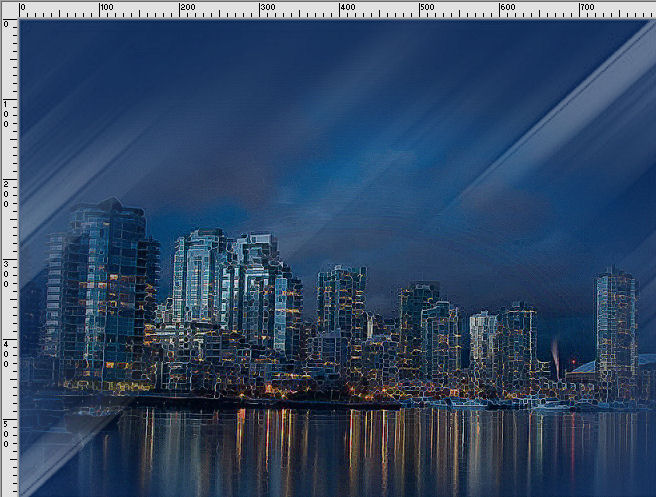
STEP 6 Maximise tube yp_perfume_nuit_etoilee.psp Edit >> Copy Minimise tube Edit >> Paste >> Paste as New Layer Effects >> Image Effects >> Offset 
STEP 7 Effects >> 3D Effects >> Drop Shadow with the following settings Shadow on new layer CHECKED 
STEP 8 In the Layers Palette highlight RASTER 3 (perfume bottle) Repeat Drop Shadow changing the vertical and horizontal offsets to 10 Effects >> 3D Effects >> Drop Shadow 
This is what your Layers Palette should look like now 
Layers >> Merge >> Merge Down STEP 9 In the Layers Palette highlight RASTER 3 (perfume bottle) Reduce opacity to 85% Layers >> Properties 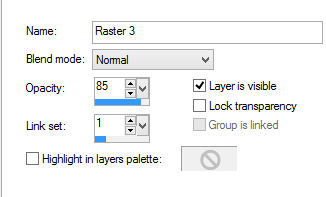
STEP 10 Maximise tube yp_star_perfume_compact.psp Edit >> Copy Minimise tube Edit >> Paste >> Paste as New Layer Image >> Resize 45% Resize All Layers UNCHECKED Effects >> Image Effects >> Offset 
Layers >> Duplicate Image >> Mirror Image >> Resize 55% Resize all layers UNCHECKED Effects >> Image Effects >> Offset 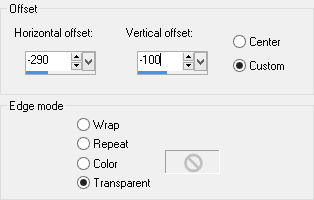
Layers >> Merge >> Merge Down Adjust >> Sharpness >> Sharpen STEP 11 Effects >> 3D Effects >> Drop Shadow Shadow on New Layer CHECKED 
Step 12 Image >> Add Borders 
STEP 13 Selection Tool >> Magic Wand Select yellow border STEP 14 In the Materials Palette change Foreground Style to Pattern Select csq_gold from the options with the following settings 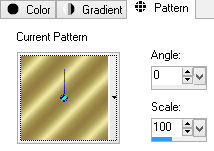
Selct Flood Fill tool and fill selection with gold pattern Selections >> Select None STEP 15 Image >> Add Borders 
STEP 16 Image >> Add Borders 
STEP 17 Layers >> Promote Background Layer STEP 18 Maximise tube LF-Deco7.png Edit >> Copy Minimise tube Edit >> Paste >> Paste as New Layer Effects >> Image Effects >> Offset 
Layers >> Duplicate Layers >> Merge >> Merge Down With Freehand Selection Tool lasso the four stars as shown and DELETE 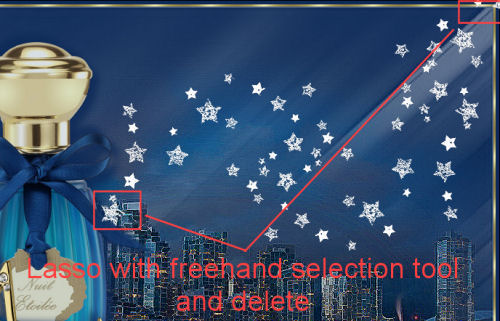
STEP 19 Effects >> 3D Effects >> Drop Shadow Shadow on New Layer CHECKED 
In the Layers Palette highlight RASTER 2 Repeat Drop Shadow changing the vertical and horizontal offsets to minus 10 (-10) Effects >> 3D Effects >> Drop Shadow 
Layers >> Merge >> Merge Down STEP 20 Maximise yp-text-starry-night.pspimage Edit >> Copy Minimise original Edit >> Paste as New Layer Effects >> Image Effects >> Image Offset 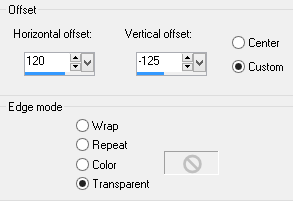
In the Layers Palette move text layer to top Effects >> 3D Effects >> Drop Shadow 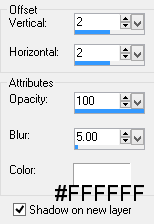
In the Layers Palette highlight RASTER 3 (text) Repeat Drop Shadow changing the vertical and horizontal offsets to minus 2 (-2) 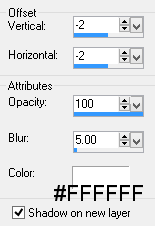
Layers >> Merge Down Edit >> Repeat Layer Merge Down Rename Raster 2 as STARS AND TEXT SHADOW This is what your layer palette should look like now 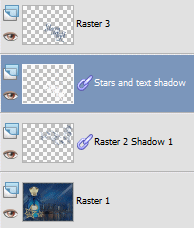
STEP 21 Layer >> New Raster Layer Add your name and/or watermark NOW TO ANIMATE STEP 22 In the Layers Palette highlight STARS AND TEXT SHADOW Effects >> Plug Ins >> DSB Flux >> Bright Noise 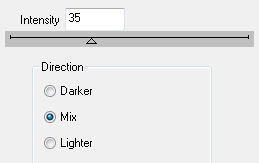
STEP 23 Edit >> Copy Merged Open Animation Shop Edit >> Paste >> As New Animation STEP 24 Back to Paint Shop Pro Edit >> Undo Bright Noise Effects >> Plug Ins >> DSB Flux >> Bright Noise 
STEP 25 Edit >> Copy Merged Over to Animation Shop Edit >> Paste >> After Current Frame STEP 26 Back to Paint Shop Pro Edit >> Undo Bright Noise Effects >> Plug Ins >> DSB Flux >> Bright Noise 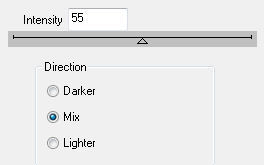
STEP 27 Edit >> Copy Merged Over to Animation Shop Edit >> Paste >> After Current Frame STEP 28 View >> Animation If you are happy with your animation, resize if desired Save as a gif I hope you enjoyed this tutorial. If you have any questions or would like to show me your result EMAIL ME Return to PSP Tutorials - Page 4 |