
|
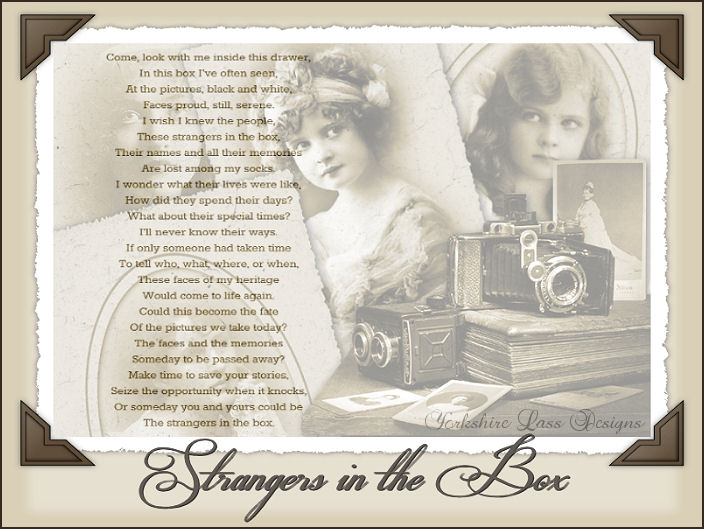
This tutorial is my own design and any resemblance to any other tutorial is purely coincidental. It was created in Paint Shop Pro X © July 2013 - Yvonne - Yorkshire Lass Designs - All rights reserved Poem "The Strangers in the Box" by Pam Harazim You will need the following to complete this tutorial: kTs_31FGU289 copie.psp Victorian_Young_Girl.psp vintagehsk-2011 22.pspimage vintagehsk-2011 20.pspimage colacao_curls_frills)misted5.psp yp_text_strangers-in-the-box.psp poem_strangersinthebox_pamharazim.psp Window card 04.pspFrame Classic Oval.PspFrame All the above can be downloaded here Download and extract to a file on your computer. Place frames in your Psp Frames folder Open tubes in PSP and minimise Plug Ins Filters Unlimited - Edges 17 Photo Aging Kit The above can be downloaded HERE Download and extract to your Plug Ins folder. *********** Drag this arrow with you to mark your place in the tutorial Drag and Drop Script from Dynamic Drive 
********** INSTRUCTIONS STEP 1 In the Materials Palette load Foreground with Beige #DDD7C1 and Background with White #FFFFFF STEP 2 Maximise tube Victoria_Young_girl.psp Window >> Duplicate Close original Working on the duplicate copy, delete watermark layer Image >> Resize 75% Resize All layers unchecked Adjust >> Sharpness >> Sharpen STEP 3 Layers >> New Raster Layer Select Floodfill tool and fill layer with Foreground colour Layers >> Arrange >> Move Down STEP 4 Image >> Picture Frame Select Classic Oval from the options with the following settings 
STEP 5 Effects >> 3D Effects >> Drop Shadow 
STEP 6 Layers >> Merge >> Merge Visible Effects >> Plugins >> Filters Unlimited >> Photo Aging Kit >> old Color 
STEP 7 Effects >> Plugins >> Filters Unlimited >> Photo Aging Kit >> Hairs and Dust 
STEP 8 Name this image "photo-1" and save as a psp image Minimise for now STEP 9 Maximise tube vintagehsk-2011 20.pspimage Window >> Duplicate Close original Working on the duplicate copy delete watermark layer Image >> Resize 53% Resize All layers CHECKED Image >> Resize 75% Resize All layers UNCHECKED Image >> Mirror Adjust >> Sharpness >> Sharpen STEP 10 Repeat STEPS 3 to 7 STEP 11 Effects >> Plugins >> Filters Unlimited >> Edges, Square >> Square,Edge 17 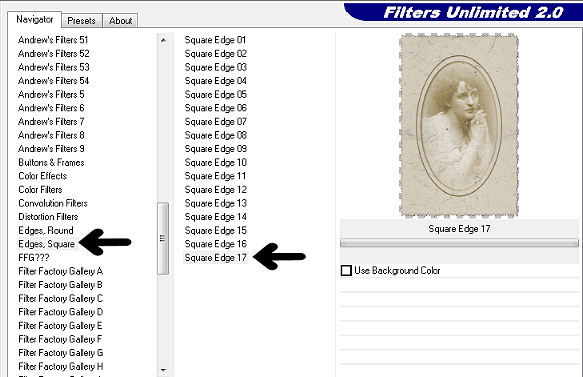
STEP 12 Name this image "photo-2" and save as a psp image Minimise for now STEP 13 Maximise tube colacao_curls_frills_misted5.psp Window >> Duplicate Close original Working on the duplicate copy select and delete the watermark Image >> Resize 75% Resize All layers checked Adjust >> Sharpness >> Sharpen STEP 14 Layers >> New Raster Layer Select Floodfill tool and fill layer with Foreground colour Layers >> Arrange >> Move Down STEP 15 Repeat STEPS 6 and 7 STEP 16 Repeat STEP 11 STEP 17 Name this image "photo-3" and save as a psp image Minimise for now STEP 18 Maximise tube vintagehsk-2011 22.pspimage Window >> Duplicate Close original Working on the duplicate copy delete the watermark Image >> Resize 50% Resize All layers checked Adjust >> Sharpness >> Sharpen STEP 19 Layers >> New Raster Layer Select Floodfill tool and fill layer with Foreground colour Layers >> Arrange >> Move Down STEP 20 Repeat STEPS 6 and 7 STEP 21 Name this image "photo-4" and save as a psp image Minimise for now STEP 22 Open a new canvas 800 x 600 white background 
Layers >> Promote Background Layer STEP 23 Maximise photo-1.psp Edit >> Copy Minimise original Edit >> Paste as New Layer Image >> Resize 70% Resize All layers unchecked Image >> Free Rotate 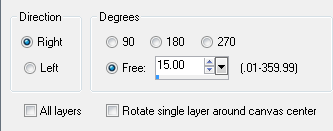
Effects >> Image Effects >> Offset 
Adjust >> Sharpness >> Sharpen Effects >> 3D Effects >> Drop Shadow same settings as in STEP 5 STEP 24 Maximise photo-4.psp Edit >> Copy Minimise original Edit >> Paste as New Layer Image >> Resize 75% Resize All layers unchecked Effects >> Image Effects >> Offset 
Adjust >> Sharpness >> Sharpen STEP 25 Maximise photo-3.psp Edit >> Copy Minimise original Edit >> Paste as New layer Image >> Resize 85% Image >> Free Rotate 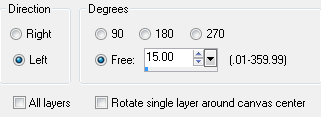
Effects >> Image Effects >> Offset 
Adjust >> Sharpness >> Sharpen Effects >> 3D Effects >> Drop Shadow Same settings as STEP 5 STEP 26 Maximise photo-2.psp Edit >> Copy Minimise original Edit >> Paste as New layer Image >> Resize 85% Resize All Layers unchecked Image >> Free Rotate 
Effects >> Image effects >> Offset 
Adjust >> Sharpness >> Sharpen Effects >> 3D Effects >> Drop Shadow same setting as in STEP 5 STEP 27 Maximise tube kTs_3FGU289 copie.psp Edit >> Copy Minimise tube Edit >> Paste as New Layer Image >> Resize 80% Resize All layers unchecked Effects >> Image Effects >> Offset 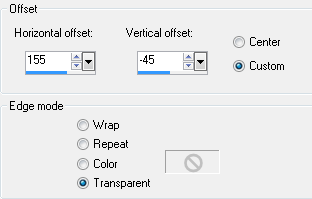
Effects >> plugins >> Filters Unlimited >> Photo Aging Kit >> Old Color same settings as in STEP 6 Adjust >> Sharpness >> Sharpen Effects >> 3D Effects >> Drop Shadow same settings as in STEP 5 STEP 28 Image >> Picture Frame Select Window card 04 from the options with the following settings 
STEP 29 Layers >> New Raster Layer Selection Tool >> Custom Selection 
Select Floodfill Tool and fill selection with Background colour White #FFFFFF Maximise poem-strangersinthebox-pamharazin.psp Edit >> Copy Minimise original Edit >> Paste into Selection Effects >> plugins >> Filters Unlimited >> Photo Aging Kit >> Old Color same settings as in STEP 6 Selections >> Select None Layers >> Arrange >> Move Down In the Layer Palette reduce opacity to 57% Layers >> Properties 
STEP 30 In the Layer Palette highlight the top layer (Picture Frame) Maximise yp_text_strangers-in-the-box.psp Edit >> Copy Minimise original Edit >> Paste as New layer Effects >> Image Effects >> Offset 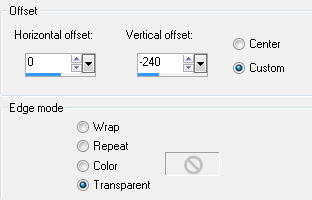
STEP 31 Layer >> New Raster Layer Add your name and/or watermark Layers >> Merge >> Merge All (Flatten) STEP 32 Image >> Add Borders 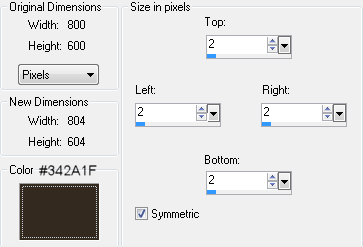
STEP 33 Save as a jpg I hope you enjoyed this tutorial. If you have any questions or would like to show me your result EMAIL ME Return to Tutorials - Page 2 |