
|
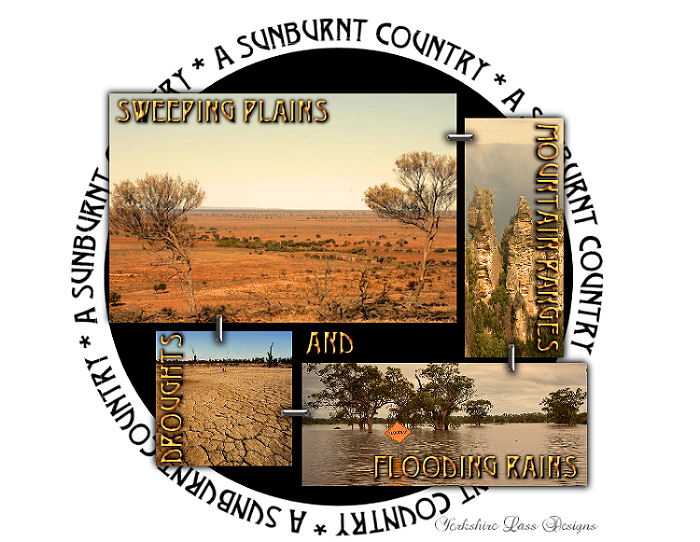
This tutorial is my own design and any resemblance to any other tutorial is purely coincidental. It was created in Paint Shop Pro X © December 2012 - Yvonne - Yorkshire Lass Designs - All rights reserved. Inspired by the poem "My Country" by Dorothea Mackellar (1885-1968), an Australian poet and fiction writer. Read the full poem HERE You will need the following to complete this tutorial: Template by Dezigns by Ali 46 from http://designsbyali.blogspot.com (link inactive) plains.jpg floods.jpg drought.jpg mountains.jpg yp_wordart_sunburnt_country.psp yp_wordart_sunburnt_country_circular.psp All the above can be downloaded HERE Download and extract to a file on your computer. Open in PSP and minimise. *********** Drag this arrow with you to mark your place in the tutorial Drag and Drop Script from Dynamic Drive ********** INSTRUCTIONS STEP 1 Maximise Template by Dezigns by Ali 46 Windows >> Duplicate Close original copy of the template STEP 2 Image >> Canvas Size 
STEP 3 In the Layer Palette delete DBA layer 
STEP 4 Still in the Layer Palette highlight RECTANGLE SHAPES layer 
STEP 5 With the Magic Wand 
select the large grey rectangle STEP 6 Maximise plains.jpg Edit >> Copy Minimise image Edit >> Paste into Selection Adjust >> Sharpness >> Sharpen Do not de-select STEP 7 Effects >> 3D Effects >> Drop Shadow 
Repeat Drop Shadow changing Vertical and Horizontal Offsets to minus 2 (-2) Selections >> Select None STEP 8 With the Magic Wand same settings as in STEP 5 select the dark grey rectangle Maximise mountains.jpg Edit >> Copy Minimise image Edit >> Paste into Selection Adjust >> Sharpness >> Sharpen Do not de-select Apply Drop Shadow as in STEP 7 Selections >> Select None STEP 9 With the Magic Wand same settings as in STEP 5 select the dark grey square Maximise drought.jpg Edit >> Copy Minimise image Edit >> Paste into Selection Adjust >> Sharpness >> Sharpen Do not de-select Apply Drop Shadow as in STEP 7 Selections >> Select None STEP 10 With the Magic Wand same settings as in STEP 5 select the remaining rectangle Maximise floods.jpg Edit >> Copy Minimise image Edit >> Paste into Selection Adjust >> Sharpness >> Sharpen Do not de-select Apply Drop Shadow as in STEP 7 Selections >> Select None STEP 11 Still on the RECTANGLE SHAPES layer Adjust >> Color Balance 
STEP 12 In the Layer Palette highlight STAPLES layer 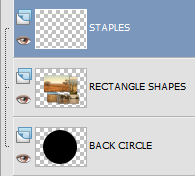
Apply Drop Shadow as in STEP 7 STEP 13 Maximise tube yp_wordart_sunburnt_country.psp Edit >> Copy Minimise tube Edit >> Paste as New Layer With the Move Tool move tube down slightly (see finished tag for placement) STEP 14 Maximise tube yp_wordart_sunburnt_country_circular.psp Edit >> Copy Minimise tube Edit >> Paste as New Layer With the Move Tool adjust position so that the tube sits evenly around the black circle Layers >> Arrange >> Send to Bottom STEP 15 In the Materials Palette load Foreground with #FFFFFF White Layers >> New Raster Layer Flood fill layer with Foreground colour Layers >> Arrange >> Send to Bottom STEP 16 Add your name/and or watermark Layers >> Merge All (Flatten) Resize if desire and save as a jpg I hope you enjoyed this tutorial. If you have any questions or would like to show me your result EMAIL ME Return to Tutorials - Page 2 |