
|

This tutorial is my own design and any resemblance to any other tutorial is purely coincidental. It was created in Paint Shop Pro X © January 2013 - Yvonne - Yorkshire Lass Designs - All rights reserved. You will need the following to complete this tutorial: Template by Dezigns by Ali 64 from http://designsbyali.blogspot.com (link inactive) 1Patries_DS563-Boleroby Ty Wilson-14-11-10.psp 1Patries_DS72-Ty Wilson004Zblue-21-7-11.psp from http://www.sitevanpatries.nl tango-music-bkgd.gif yp_text_tango.psp yp_text_tango_02.psp All the above can be downloaded HERE Download and extract to a file on your computer. Open in PSP and minimise. Plug Ins Filters Unlimited - Edges, Square, Square Edge 17 Penta.com - Color Dot The above can be downloaded HERE Download and extract to your Plug Ins folder. *********** Drag this arrow with you to mark your place in the tutorial Drag and Drop Script from Dynamic Drive ********** INSTRUCTIONS STEP 1 Maximise Template by Dezigns by Ali 64 Windows >> Duplicate Close original copy of the template STEP 2 Image >> Canvas Size 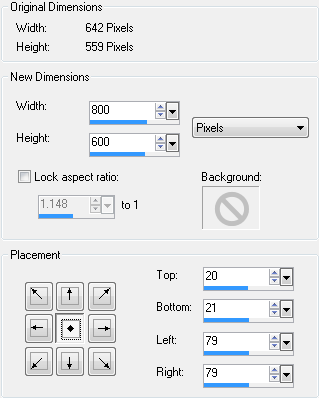
STEP 3 In the Layer Palette delete DBA layer 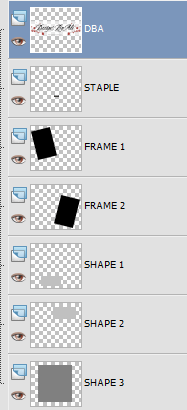
STEP 4 In the Materials Palette load foreground with Red #C23D2E STEP 5 In the Layer Palette highlight SHAPE 3 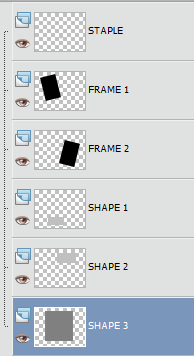
(NOTE: If you find it easier... close the layers above SHAPE 3 while working on this layer. Then open and activate each layer as needed.) With the Magic Wand 
select the shape Flood fill shape with foreground colour Red #C23D2E Do not de-select STEP 6 Effects >> Plug Ins >> Penta.com >> Color Dot 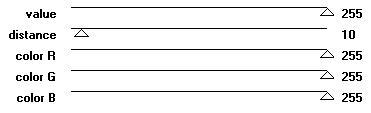
Do not de-select STEP 7 Effects >> 3D Effects >> Drop Shadow 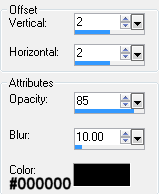
Repeat Drop Shadow changing Vertical and Horizontal Offsets to minus 2 (-2) Selections >> Select None STEP 8 In the Materials Palette load foreground with Blue #38498F STEP 9 In the Layer Palette highlight SHAPE 2 
With the Magic Wand same settings as in STEP 5 select the shape Flood fill shape with foreground colour Blue #38498F Apply Drop Shadow same settings as in STEP 7 Selections >> Select None STEP 9 In the Materials Palette load foreground with Yellow #E5CB14 STEP 10 In the Layer Palette highlight SHAPE 1 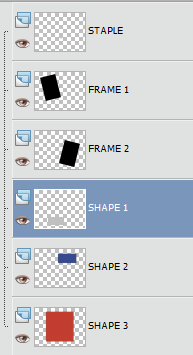
With the Magic Wand same settings as in STEP 5 select the shape Flood fill shape with foreground colour Yellow #E5CB14 Apply Drop Shadow same settings as in STEP 7 Selections >> Select None STEP 11 In the Layer Palette highlight FRAME 2 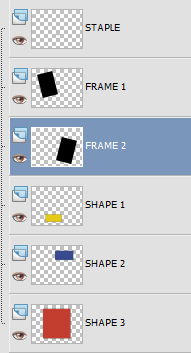
STEP 11 Maximise tube 1Patries_DS72-Ty Wilson004Zblue-21-7-11.psp Edit >> Copy Minimise tube Edit >> Paste as New Layer With the Move Tool centre tube over Frame 2 
STEP 12 Effects >> 3D Effects >> Drop Shadow 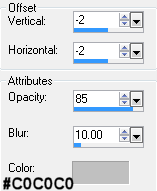
STEP 13 Layers >> Merge >> Merge Down Apply Drop Shadow same settings as in STEP 5 STEP 14 In the layers palette highlight FRAME 1 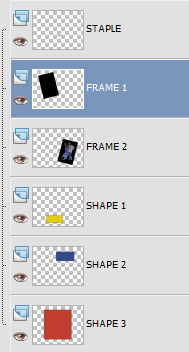
STEP 15 Maximise tube 1Patries_DS563-Boleroby Ty Wilson-14-11-10.psp Edit >> Copy Minimise tube Edit >> Paste as New Layer Image >> Free Rotate 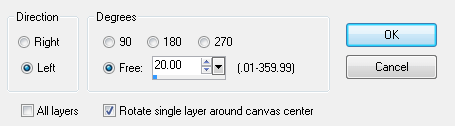
Image >> Resize 90% Resize all layers unchecked With the Move Tool centre tube over Frame 1 
Adjust >> Sharpness >> Sharpen STEP 16 Apply Drop Shadow as in STEP 12 STEP 17 Layers >> Merge >> Merge Down Apply Drop Shadow same settings as in STEP 5 STEP 18 Maximise tube yp_text_tango.psp Edit >> Copy Minimise tube Edit >> Paste as New Layer With the Move Tool centre tube over the blue rectangle In the Layer palette move this layer below Frame 2 STEP 19 Maximise tube yp_text_tango-02.psp Edit >> Copy Minimise tube Layers >> Arrange >> Bring to Top With the Move Tool centre tube over the yellow rectangle See finished tag for placement STEP 20 In the Materials Palette change foreground Style to Pattern Locate tango-music-bkgd 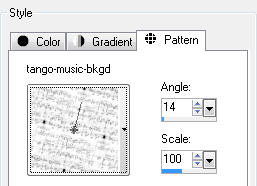
Layers >> New Raster Layer Flood fill layer with foreground pattern Layers >> Arrange >> Send to Bottom STEP 21 Effects >> Plug Ins >> I.C.I.Net Software >> Filters Unlimited 2.0 Edges, Square >> Square Edge 17 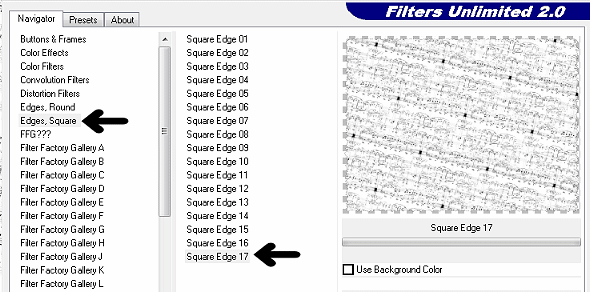
STEP 22 (NOTE: If you closed and opened the layers as you worked through the tutorial you will have to open the STAPLE layer now) Layers >> New Raster Layer Add your name/and or watermark Layers >> Merge >> Merge All (Flatten) STEP 23 Image >> Add borders 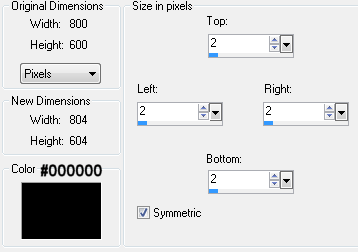
STEP 24 Resize if desire and save as a jpg I hope you enjoyed this tutorial. If you have any questions or would like to show me your result EMAIL ME Return to Tutorials - Page 2 |