
|

This tutorial is my own design and any resemblance to any other tutorial is purely coincidental. It was created in Paint Shop Pro 8. © Yvonne - Yorkshire Lass Designs - September 2009 - All Rights Reserved ~ Revised April 2012 ~ You will need the following to complete this tutorial: Tubes site_divers_1219072744_divers.pspimage by_stirner_red_dress.psp yp_4_rings.pspimage Pattern MD-Gold.bmp Font Abdiel.ttf The above can be downloaded in a rar file here Right click on the icon and save to your computer Extract tubes and pattern to a file on your computer then open in PSP and minimise Extract font to your Fonts folder, open and minimise Plug Ins Penta com >> Dot and Cross Available here http://www.fleursauvage.be/utilitaire/filtres/filtres.htm Extract to your PSP Plugins folder ********** Drag this arrow with you to mark your place in the tutorial ********** STEP 1 Open a new transparent canvas 700 x 500 pixels. Set your Foreground to #F27A68 and your Background to #F4E1D3 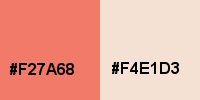
Change your Foreground to Gradient with the following settings: Style = Sunburst 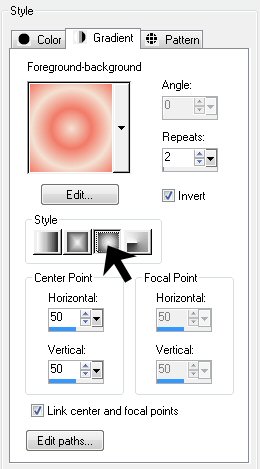
Flood fill canvas with Gradient Image >> Resize 85% Resize all layers unchecked. STEP 2 Open tube site_divers_1219072744_divers.pspimage Edit >> Copy Minimise Tube Edit >> Paste >> Paste as New Layer Move to the top with the Move Tool Image >> Resize >> 85%, resize all layers unchecked Adjust >> Sharpness >> Sharpen In the Layer Palette change the blend mode to Luminance (L) and lower the opacity to 70 STEP 3 In the Layer Palette highlight Raster 1 With the Magic Wand select the transparent border 
Edit >> Clear Selections >> Select None This step deletes any of the tube hanging over the edge STEP 4 With the Selection Tool 
draw out a rectangle as follows: 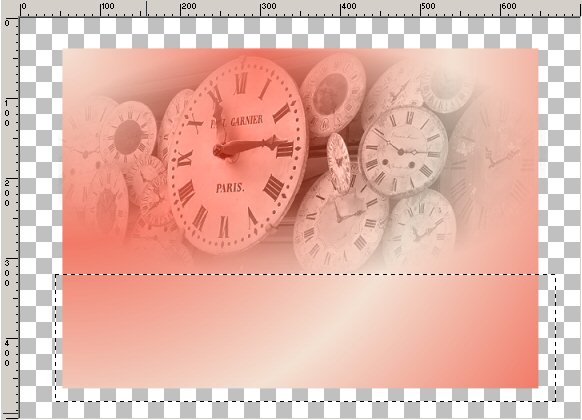
Edit >> Clear Selections >> Select none Layers >> Merge >> Merge Visible STEP 5 Layers >> New Raster Layer Flood fill with background colour #F4E1D3 Effects >> Plug Ins >> Penta.com >> Dot and Cross 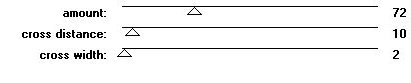
Layers >> Arrange >> Send to bottom STEP 6 In the Layer Palette highlight the Merged layer Effects >> 3D Effects >> Drop Shadow 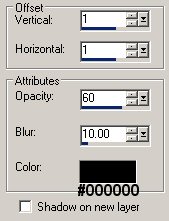 Repeat Drop Shadow changing the Vertical and Horizontal Offsets to minus 1 (-1) Layers >> Merge >> Merge All (Flatten) This is what you should have now 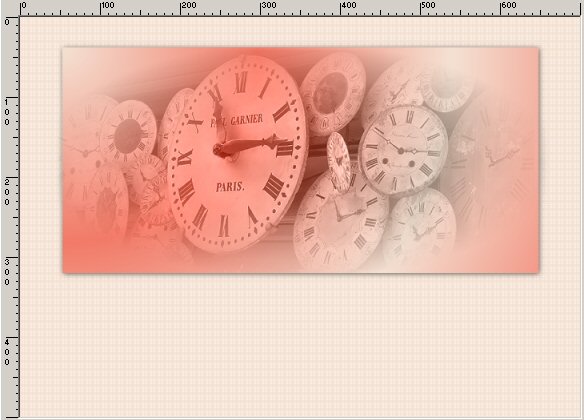
STEP 7 Image >> Add Borders 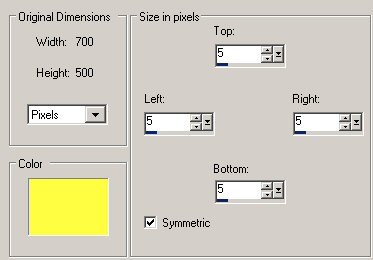 With the Magic Wand Tool select the yellow border
Flood fill selection with Foreground colour #F27A68 Effects >> 3D Effects >> Inner Bevel 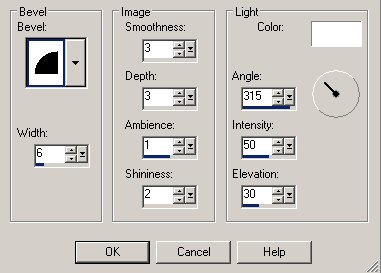
Selections >> Select None STEP 8 Image >> Add Borders 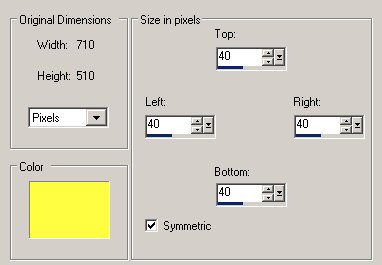
With the Magic Wand Tool (same settings as in STEP 7) select the yellow border Flood fill the selection with the Gradient Selections >> Select None STEP 9 Repeat STEP 7 STEP 10 Open tube by_stirner_red_dress.psp Edit >> Copy Minimise tube Edit >> Paste >> Paste as New Layer Image >> Mirror With the Move Tool position so that the tube hides the bottom edge of the clock panel (see finished image for placement) Effects >> 3D Effects >> Drop Shadow Same settings as in STEP 6 Repeat Drop Shadow changing the Vertical and Horizontal Offsets to minus 1 (-1) Layers >> Merge >> Merge All (Flatten) STEP 11 In the Materials Palette, load MD-Gold pattern into foreground, Angle = 0, Scale = 100 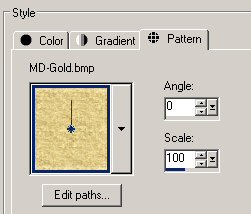
Image >> Add Borders 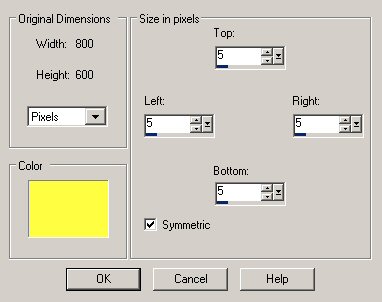
With the Magic Wand Tool (same settings as in STEP 7) select the yellow border Flood fill with pattern MD-Gold Effects >> Edge Effects >> Enhance More Selections >> Select None STEP 12 Repeat STEP 7 STEP 13 In the Materials Palette your Foreground should be set to #F27A68 and your Background to #F4E1D3 Select the Text Tool 
Click on the image and type the word "Waiting" in the dialogue box Layers >> Convert to Raster With the Move Tool postion in the top left corner See finished image for placement Effects >> 3D Effects >> Drop Shadow Same settings as in STEP 6 Repeat Drop Shadow changing the Vertical and Horizontal Offsets to minus 1 (-1) STEP 14 Maximise tube yp_4_rings.pspimage Edit >> Copy Minimise tube Edit >> Paste >> Paste as New Layer Layers >> Duplicate Repeat twice more so that you have 4 sets of rings With the Move Tool position 2 sets of rings on the left-hand side and 2 sets on the right-hand side See finished image for placement. STEP15 Add your name and/or watermark Layers >> Merge >> Merge All (flatten) Resize if desired and save as a jpg. I hope you enjoyed this tutorial! If you have any questions or would just like to show me your result EMAIL ME BACK TO TUTORIALS - PAGE 1 |