
|
This tutorial is my own design and any resemblance to any other tutorial is purely coincidental. It was created in Paint Shop Pro V8 and Animation Shop © 2009 - Yvonne - Yorkshire Lass Designs - All rights reserved. ~ Revised September 2012 ~ You will need the following to complete this tutorial: Tubes, Mask and Glitter taurus.psp or whichever star sign you prefer from birgittasplace.com yp_star-ring.psp Becky Mask022.jpg Winni glitter gold-4.gif from Winni's Designs The above can be downloaded HERE Download and extract to a file on your computer. Open tubes and mask in PSP and minimise. Leave glitter in the file untouched for now. Plugins Unplugged Tools - Star Chart Available here http://www.fleursauvage.be/utilitaire/filtres/filtres.htm Download and extract to your Plugins folder *********** Drag this arrow with you to mark your place in the tutorial Drag and Drop Script from Dynamic Drive ********** INSTRUCTIONS STEP 1 Open new canvas 600x 600 pixels white Layers >> Promote Background Layer View >> Rulers STEP 2 In the Materials Palette load Foreground with Gold #9F9741 Layers >> New Raster Layer Flood fill layer with Foreground colour STEP 3 Layers >> New Mask Layer >> From Image Select becky mask022 from the drop down list 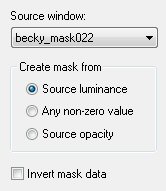
Layers >> Merge >> Merge Group STEP 4 Effects >> Plugins >> UnPlugged Tools >> Starchart 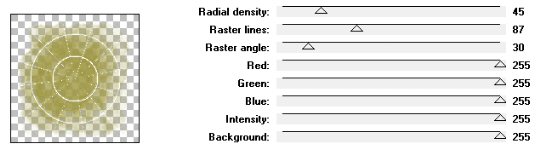
STEP 5 Select the Preset Shape Tool and choose Ellipse from the shapes list Starting at 80 pixels across and 80 pixels down Draw out a circle a little larger than the outer circle 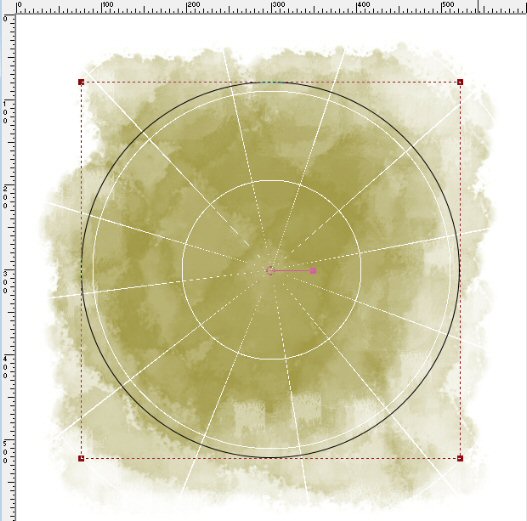
Selections >> Select None STEP 6 In the Materials Palette load Foreground with Gold #9F9741 and make the Background null Select the Text Tool with the following settings Place the cursor over the circle, when it changes to an A with a curve under it left click Type TAURUS in the text box until the circle is complete I typed TAURUS with a space between each word then added an extra space between some of the words until the text was even around the circle. If you are using a zodiac sign other than Taurus, you will need to play with the word spacing. Selections >> Select None This is what you should have now 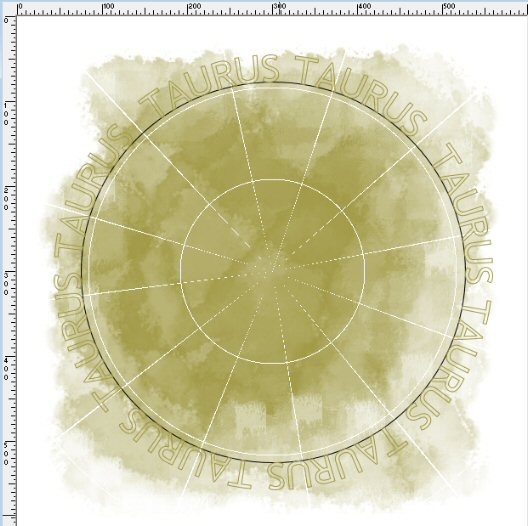
STEP 7 In the Layers Palette click on the plus sign 
Click on the eye to make the ellipse invisible 
Layers >> Convert to Raster Layer STEP 8 Layers >> Duplicate Layers >> Merge >> Merge Down Layers >> Duplicate Image >> Resize 55% Resize All Layers unchecked STEP 9 Layers >> Duplicate Layers >> Merge >> Merge Down STEP 10 Maximise tube taurus.psp Edit >> Copy Minimise tube Edit >> Paste >> Paste as New Layer STEP 11 Effects >> 3D Effects >> Drop Shadow 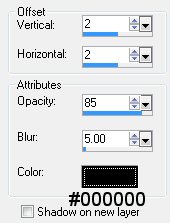
Repeat drop shadow changing the Vertical and Horizontal Offsets to minus 2 (-2) STEP 12 Layers >> New Raster Layer Add your name and/or watermark Layers >> Merge >> Merge All Visible STEP 13 Maximise tube yp_star-ring.psp Edit >> Copy Minimise tube Edit >> Paste>> Paste as New Layer Adjust position if necessary NOW TO ANIMATE THE STARS STEP 14 File >> Jasc Software Products >> Launch Animation Shop Open winni.glitter.gold.4.gif Edit >> Select All Edit >> Copy STEP 15 Over to Paint Shop Pro Edit >> Paste >> AS Animation as Multiple Images You should now have 3 separate glitter images I re-named these images winni-glitter-gold-4-1.jpg, winni-glitter-gold-4-2.jpg and winni-glitter-gold-4-3.jpg STEP 16 We need 3 star layers to match the number of glitter images In the Layer Palette highlight Raster 4 (the star layer) Layers >> Duplicate twice Re-name these layers Star 1, Star 2 and Star 3 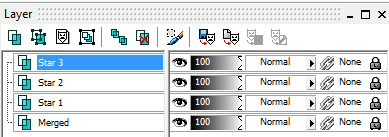
STEP 17 In the Layer Palette highlight Star 1 and hide Star 2 and Star 3 With the Magic Wand 
and holding down the shift key select all the stars In the Materials Palette change the Foreground Style to Pattern Load winni-glitter-gold-4-1 from the selection of patterns 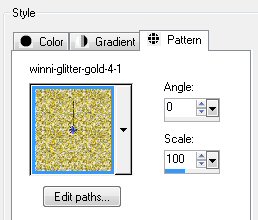
Select the Floodfill Tool and apply Foreground pattern to all the stars Do not de-select Effects >> 3D Effects >> Drop Shadow 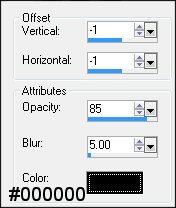
Do not de-select STEP 18 In the Layer Palette open and highlight Star 2 and hide Star 1 and Star 3 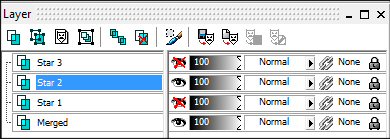
Load Foreground with winni-glitter-gold-4-2 Select the Floodfill Tool and apply Foreground pattern to all the stars Apply Drop Shadow as in STEP 16 Do not de-select STEP 19 In the Layer Palette open and highlight Star 3 and hide Star 1 and Star 2 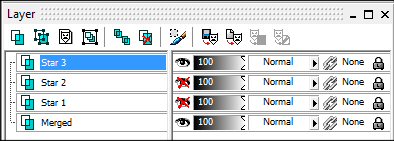
Load Foreground with winni-glitter-gold-4-3 Select the Floodfill Tool and apply Foreground pattern to all the stars Apply Drop Shadow as in STEP 16 Selections >> Select None STEP 20 Still working in the Layer Palette Highlight Star 1 Hide Star 3 and Star 2 Edit >> Copy Merged Over to Animation Shop Edit >> Paste >> As New Animation Return to Paint Shop Pro STEP 21 Open and highlight Star 2 Hide Star 1 and Star 3 Edit >> Copy Merged Over to Animation Shop Edit >> Paste >> After Current Frame Return to Paint Shop Pro STEP 22 Open and highlight Star 3 Hide Star 1 and Star 2 Edit >> Copy Merged Over to Animation Shop Edit >> Paste >> After Current Frame STEP 23 View >> Animation STEP 24 Save as a gif and we're done Here is another example 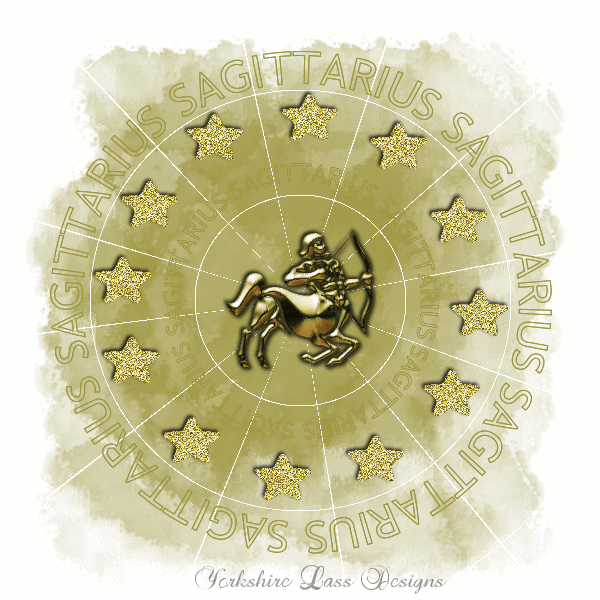
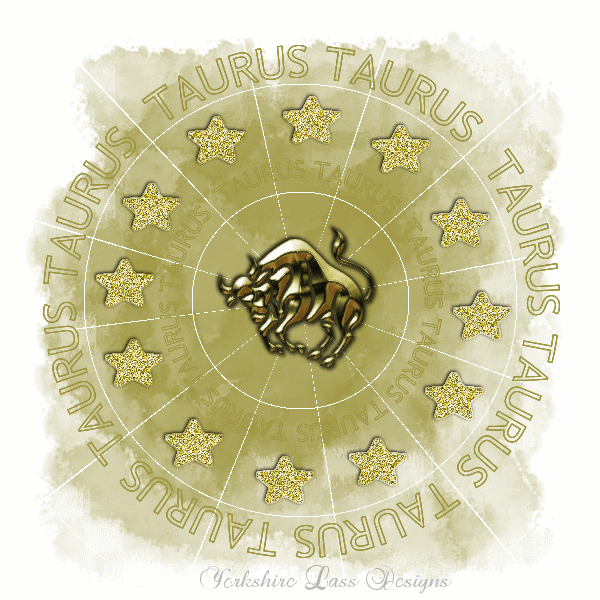
I hope you enjoyed this tutorial. If you have any questions or would like to show me your result EMAIL ME Return to Tutorials - Page 1 |